Sunday, November 29, 2015

Trumpeter's Sd.Kfz. 7/1 Flakvierling

As is widely known the ammo trailer that comes with the kit is not accurate. The 20 mm Flakvierling in this kit is the Flak 38 while the single barrel gun is known as the Flak 30. The kit trailer is actually for the Flak 30.

To correct this I purchased Bronco's excellent Sd.Ah 52 flak ammo trailer. There has been a lot of discussion online about what flak trailer went with what flak wagon and there have been comments that the Sd.Ah 52 was only for the 3.7 cm Flak 18/36/ etc.  auto cannon while the Flak 38 vehicles used the Sd.Ah 56 or later 57 trailer.  While it is true that the Sd.Ah 52  trailer was the default trailer used on mounted 3.7 cm flak wagons, it was also used on the Flak 38 vehicles due its large size and need for lots of ammo for its quad auto canon.

There are a few distinguishing features between the -52 and -56 trailers but the most easily recognizable difference were the wheel rims.

Here's a picture of a mid or late Sd.Kfz 7/1 Flakvierling 38 towing a Sd.Ah 56 flak trailer. Note the convex shape of the wheel rim and bolt sequence on the hub. Also a picture of just the trailer itself.


Now, here'a picture of the Sd.Ah 52 trailer.Note the flat face of the rim.


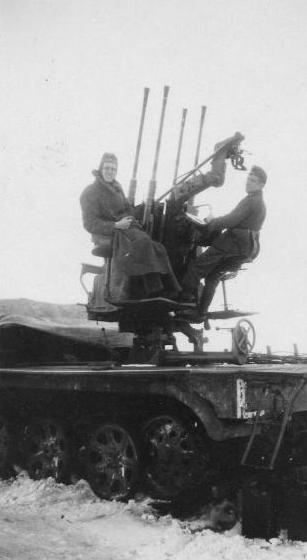
And here are pictures of some early flak 38 vehicles towing the Sd.Ah 52 trailer.


Trumpeter's Sd.Kfz. 7/1 Flakvierling (Early)

So, I took a look at Terry Ashley's review of this kit and the Dragon equivalent on PMMS and while Terry says the Dragon kit is a better kit for fit and sharpness of  part detail, the Trumpeter kit is much more detailed.

One issue for both kits is the mount for the Flakvierling. PMMS says the Dragon one is accurate while the Tumpeter one is not. In fact neither are really correct. Having looked at a number of pictures the mount had a number of legs on them which to further cloud things looks  to have been modified in the field. In the picture below it appears that the crew has attached a vertical set of legs to the angled leg coming from the bottom of gun. I suspect this was to give it more height and and a clearer field of fire.

Now having said all this which one to use. I could scratch build a mount but I ain't  interested in this option. Besides who in the hell is going to really bitch about the mount unless one is a fanatical Follower of this type of vehicle and even then the mounts varied from one vehicle to another.One straight forward option is  I can just use the Trumpeter kit part. Funny thing about the Trumpy part is that its very similar to the mount on the old Tamiya 7/1 Flakvierling. Also, I have a picture showing what looks like a close match to this mount. see below.


Similar to the Trumpeter mount


Trumpeter's 1/35 Sd.Kfz. 7/1 Flakvierling (Early)

If you have been visiting my blog you will see that for the last couple of years I have been focusing on building aircraft. I been wanting to expand my skills in that area and continue to do so but I now I want to begin a return to building armour subjects and for my first foray back into this side of modelling I decided on Trumpeters 7/1 flakwagon. I had most of what I need to build it but when I moved to aircraft modelling it was put on the back burner. The only part I added recently was the Griffon PE set for the engine which was acquired after I took the below picture. The kit has a ton of photoetch so I didn't need to add a lot in this area.Take a look at the stuff I am going to use.


Sunday, July 19, 2015

P-47D-25 Coffey's Pot

I just finished my Hasegawa P-47D-25 in 1/48 scale and thought I would post some pics. I did this one for a group build over on World War II Aircraft.net and it was well received by the folks there. Hope you like it.


Friday, July 10, 2015

FW190A-5 Complete

Hi All,

It's been quite some time since I posted on my blog. During that period I was able to complete my FW190A-5.  Here are some shots. I am going to add a base to it and some ground effects but haven't gotten to that yet. More pictures can be seen in my picture gallery.


Monday, January 12, 2015

FW190A-5 "Minke Pinke"

Here's another update. After adding another gloss coat to seal the decals in,  I have added a wash to bring out the panel lines and to dirty up the airframe a bit. Next will be another sealing coat to protech the wash. You can now see the tonal variations a bit better in these shots. You will also notice that the paint scheme is not dead flat. I purposely did this as I noted from various reference pictures that these aircraft had a bit of sheen to their camo paint. I wanted to replicate that. Depending on how things go I might leave it as is or add another flat coat to lessen the somewhat satin appearance it has.


FW190A-5 Hans Philipp "Minke Pinke"

Just in case you haven't been checking out this build over on WorldWarII Aircraft.net here are some more progress shots of Minke Pinke.

RLM74, 75, 76 sprayed on using Vallejo Air. I used various darkened and lightened shades of each colour to add tonal variation to the paint scheme. This is meant to show how the paint scheme would change in colour as a result of being subjected to the elements. As the rule goes alway work from dark to light colours. Experienced modelers have been doing this for years so my technique is not new. Some call it the 3 layer blend technique but its not new either. It's bit hard to see due to the gloss coat but you can see a better example of what I am talking about by looking at the third picture of the underside of the aircraft. Here you can see a bit the varying colours inside and around the panel lines. I never use paints straight out of the bottle.